In this article we are going to learn some of the major use of OpenCV or CV2.
OpenCV is a library mainly used to read/write and manipulate images.
You can find the official page here https://pypi.org/project/opencv-python/.
Installation: pip install opencv-python
Importing Library: import cv2
Supported Versions: 3.6, 3.7, 3.8, 3.9
Basic understanding of image:
We all know that an image is nothing but an array of pixels.
Each pixel is a number.
Based on the number the color of the pixel will be.
Example: 0 – Black and 1 – White.
Read Image: cv2.imread()
Lets consider we have a small image of 28 X 28 pixels.
import cv2

##Read image
image_path="4.png"
img=cv2.imread(image_path,0)

#Now we have the image in img variable.
#To visualize the image we can use matplotlib.pyplot

import matplotlib.pyplot as plt
plt.imshow(img, cmap="gray")
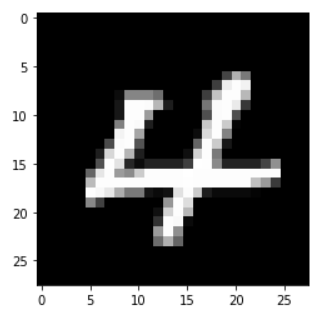
From the above program, you can see that we have a image “4.png”.
cv2.imread(filename, 0) – Read and returns the image.
0 mentions the color of the image. 0 as second parameter will read the image in gray-scale mode. i.e. the image will only be a 2D array and the 3rd dimension for color will not be added.
Other available Flags are given below:
cv::IMREAD_UNCHANGED = -1,
cv::IMREAD_GRAYSCALE = 0,
cv::IMREAD_COLOR = 1,
cv::IMREAD_ANYDEPTH = 2,
cv::IMREAD_ANYCOLOR = 4,
cv::IMREAD_LOAD_GDAL = 8,
cv::IMREAD_REDUCED_GRAYSCALE_2 = 16,
cv::IMREAD_REDUCED_COLOR_2 = 17,
cv::IMREAD_REDUCED_GRAYSCALE_4 = 32,
cv::IMREAD_REDUCED_COLOR_4 = 33,
cv::IMREAD_REDUCED_GRAYSCALE_8 = 64,
cv::IMREAD_REDUCED_COLOR_8 = 65,
cv::IMREAD_IGNORE_ORIENTATION = 128
This image can be visualized using matplotlib.pyplot imshow(img). If we do not mention the cmap value, matplotlib will automatically assign a colormap to it.
The shape of this image can be found using the shape attribute as it is an array of pixels(again numbers).
img.shape
(28, 28)
Resize Image using cv2.resize()
Lets explore the values of the array.
The array shape is 2D 28 X 28. To have a good view of array in notebook result, I have resized the image to 18 X 18.
import numpy as np
number_arr = np.asarray(img)

img_resized = cv2.resize(img, (18,18))

print(np.asarray(img_resized))
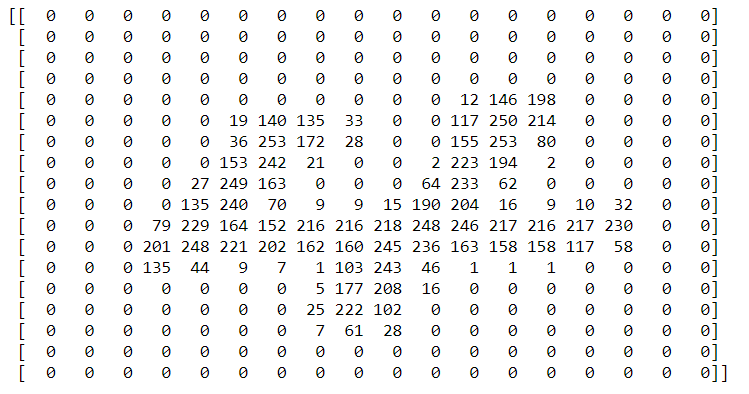
You can see that there is a 4 shape in the array where numbers are > 0.
Interesting! isn’t it? Enjoy!
We will meet with a new tip in Python. Thank you! 👍
Like to support? Just click the heart icon ❤️.
Happy Programming!🎈.
Great tips on using OpenCV! I found the explanation of `imread()` and `resize()` really helpful, especially the details on handling different image formats. Looking forward to trying these out in my projects!
Great tips on using OpenCV! I love how straightforward the `imread()` and `resize()` functions are. They make image processing so much simpler. Looking forward to more Python tips!
Great tip! The examples for using `imread()` and `resize()` in OpenCV are really helpful. The resizing function is especially useful for preprocessing images before feeding them into a model. Looking forward to more tips!
Great tips! I’ve been trying to get started with OpenCV, and the imread() and resize() functions are exactly what I needed. The examples you provided really helped clarify their usage. Can’t wait to implement this in my project!
Great tip! I’ve been using OpenCV for a while, but I didn’t realize how easy it is to use `imread()` and `resize()` together. This will definitely help streamline my image processing workflow. Thanks for sharing!
Great tip! I’ve been wanting to get more familiar with OpenCV, and your explanation of imread() and resize() is super clear. Can’t wait to try it out in my next project! Thanks for sharing!
Great tip! I love how you’ve broken down the usage of imread() and resize(). It’s super helpful for anyone looking to get started with OpenCV. Looking forward to more tips!
Great tip! I’ve been wanting to get into image processing with Python, and your explanation of `imread()` and `resize()` was really helpful. Can’t wait to try it out in my own projects! Thanks for sharing!
Great tip! I appreciate the clear explanation of using cv2.imread() and resize(). It’s really helpful for managing image sizes before processing. Looking forward to more Python tips!
Great tips on using OpenCV! I found the `imread()` and `resize()` functions really helpful for my image processing projects. Thanks for breaking it down so clearly!
Thank you for your feedback. Happy that this was helpful to you.
Great tip! I’ve been using OpenCV for a while, but I didn’t realize how straightforward the `resize()` function could make my image processing tasks. Thanks for sharing this insight! Looking forward to more tips!
Thank you for your feedback. Sure! will post more tips soon.